在一开始时,Web仅有文本,那真的是很无趣。幸运的是,没过多久,能够嵌入图片(以及其他更有趣的类型)的网页代替了这种纯文本网页,还有其他类型的多媒体要考虑,但是从humble<img>元素开始是符合逻辑的,它常常被用来在网页中嵌入一个普通的图片。在这篇文章中,我们要看看怎样更深入的使用它,包括基础,用标题注解<figure>,以及怎样把它和CSS背景图片链接起来。
| Prerequisites: | Basic computer literacy, basic software installed, basic knowledge of working with files, familiarity with HTML fundamentals (as covered in Getting started with HTML.) |
|---|---|
| Objective: | To learn how to embed simple images in HTML, annotate them with captions, and how HTML images relate to CSS background images. |
怎样将一幅图片放到网页上?
为了将一幅简单的图片展示到网页上我们通常会使用 <img> 元素。它是一个空元素(不需要包含内容也不需要闭合标签)最少只需要一个src (pronounced sarc, sometimes spoken as its full title, source)来使其生效。src 属性包含了指向我们想要引入的图片的路径,可以是相对路径或绝对路径,就像 <a> 元素中的 href 属性一样 (你可以阅读 A quick primer on URLs and paths 来唤醒一下你的记忆.)
举个例子来看,如果你有一幅文件名为 dinosaur.jpg 的图片并且存放在和你的 HTML 页面相同路径下,那么你可以像下面这样来将图片放到页面上展示:
<img src="dinosaur.jpg">
如果这张图片存储在和 HTML 页面同路径 image 文件夹的子路径下 (which is what Google recommends for SEO/indexing purposes), 那么你可以采用如下形式:
<img src="images/dinosaur.jpg">
以此类推。
Note: 搜索引擎也读取图像的文件名并且通过SEO计算——因此你应该给你的图片一个描述性的文件名(dinosaur.jpg 比 img835.png.要好)
当然你也可以像下面这样使用完整的绝对路径:
<img src="https://www.example.com/images/dinosaur.jpg">
但是这种方式是不被推荐的,这样做只会使浏览器做更多的工作,例如重新通过 DNS 再去寻找 IP 地址。但是人们基本上总是把图片和 HTML 放在同一个存放网站的服务器上。
警告:大多数图片是有版权的。不要在你的网站页面上使用这样的图片,除非(1)你是图片的拥有者(2)你有明确的图片拥有者的许可(3)你有充分的证据证明这张图片是公共领域内的。侵犯版权是违法并且不道德的。
此外,永远不要把你的src属性指向其他你没有获得许可能够链接的图片。这被称之为"hotlinking(盗链)",一再地、盗取其他人的带宽(bandwidth)是违法错误的。(这会降低你的页面的加载速度,而且你无法控制可能出现的一种尴尬——图片被移除或者被替换)
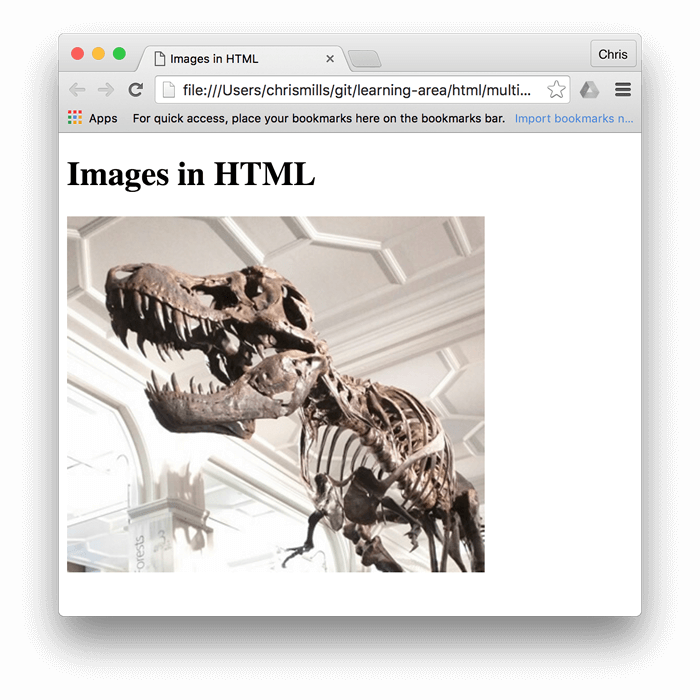
我们上面的代码会展示如下的结果页面:

Note: 你可以从 running on Github找到最终的代码(也可以看 source code)
可替换的文字
下一个我们讨论的属性是 alt — 它的值应该是该图片的文字描述,用于在图片出于某种原因无法展现时在页面上显示。例如,上面的例子可以做如下改进:
<img src="images/dinosaur.jpg"
     alt="The head and torso of a dinosaur skeleton;
          it has a large head with long sharp teeth">
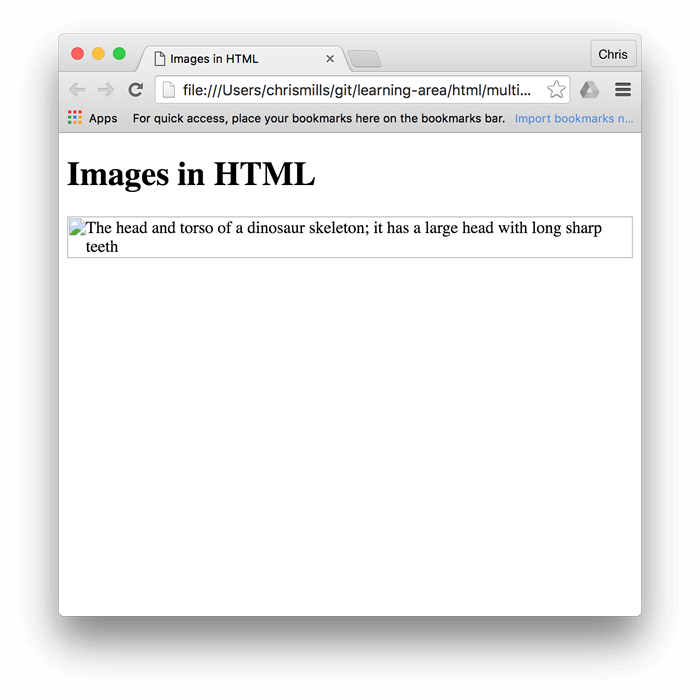
测试alt 属性最简单的方式就是故意拼错图片文件名,这样浏览器就无法找到该图片从而显示可替换的文字。如果我们将上例的图片文件名改为 dinosooooor.jpg。那么浏览器不会正确的显示图片而是会像下面一样显示出替换的文字:

那么,为什么我们需要 alt 属性呢? 想一想下面这些情形:
- 用户在视力上有障碍,通过 screen reader 来浏览我们的网站 — 在这样的情况下,拥有一段描述图片的文字是非常有用的!i
- 就像上面所说的,你也许会吧图片的路径或文件名拼错。
- 浏览器不支持该图片类型。某些用户仍在使用只显示文字的浏览器,类似 Lynx,,将会把图片替换为描述的文字。
- 你想要提供一些文字描述来给搜索引擎使用— 例如搜索引擎可能会将图片的文字描述和查询条件进行匹配。
- 用户关闭的图片显示以减少数据的传输(尤其是在使用智能手机浏览时,因为有些国家的宽带速率是有限且昂贵的)
什么才是真正应该写在 alt 属性中的文字呢? 这取决于为什么这些图片会出现在这些地方(换句话说,如果没了这些图片,你所想表达的东西会失去些什么):
- 描述. 如果图片只是装饰,而不是内容的一部分,可以增加这样的代码
alt="",例如,屏幕阅读器不会浪费时间读出对用户没用的内容。装饰性图片不应该属于你的HTML文件—— CSS background images才应该用于插入装饰图片——但如果无法避免的话,alt=""是最好的方法。 - 内容..如果你的图片提供了重要的信息,就要在
alt文本中简要的提供相同的信息,甚至更近一步,在主要文本中提供所有人都能看到的内容。不要写冗长的alt文本(如果在主要文本中将所有的段落都重复两遍,对于有目的的用户来说多么令人生气啊!)。如果在主要文本中已经对图片进行了充分的描述,那么你就仅仅用alt=""就可以了。 - 链接.如果你把图片放到
<a>标签中,图片就变成了链接。 你仍然需要提供 accessible link text(清晰的链接措辞)——在这种情况下如果你想要使其工作的更好,你可能要么将其写入同样的<a>元素中,要么将其放入图像的alt属性。 - 文本.你不应该将文本放入图像。(比如说,如果你的主要标题需要阴影, use CSS(使用CSS)而不是将文本放到图片上面)。如果你真的无法避免这样做,你可以将文本放入alt属性。
关键是提供一个可用的体验即使图片无法显示,在这种情况下用户不会丢失任何内容。尝试在浏览器中使图片不可见然后看看会有什么事情发生。你会意识到如果图片不可见,类似于像“logo”或“my favourite place”这样的alt文本是没有帮助的。
Note:WebAIM's Alternative text guide提供了更多的关于可替换文本的细节引导,如果你想了解更多的信息的话,可以阅读这篇文章。
宽度和高度
你可以用宽度和高度属性来指定你的图片的高度和宽度(你可以用多种方式找到你的图片的宽度和高度, 例如在Mac上,你可以用 Cmd + I 来得到显示的图片文件的信息) 回到我们的例子,你可以这样做:
<img src="images/dinosaur.jpg"
     alt="The head and torso of a dinosaur skeleton;
          it has a large head with long sharp teeth"
     width="400"
     height="341">
在正常的情况下,这不会对显示产生很大的影响, 但是如果图片没有显示(例如用户刚刚开始浏览网页,但是图片还没有加载完成),你会注意到浏览器会为要显示的图片留下一定的空间:

这是一件好事情——这使得页面加载的更快速更流畅。
然而,你不应该使用HTML属性来改变图片的大小。如果你把尺寸设定的太大,最终图片看起来会模糊;如果太小,会在下载远远大于你需要的图片时浪费带宽。如果你没有保持正确的纵横比(aspect ratio),图片可能看起来会扭曲。在把图片放到你的网站页面之前,你应该使用图形编辑器使图片的尺寸正确。
Note: .如果你需要改变图片的尺寸,你应该使用CSS而不是HTML。
Image titles 图片标题
就像with links一样,你可以给图片增加title属性来提供需要更进一步的支持信息。在我们的例子中,可以这样做:
<img src="images/dinosaur.jpg"
     alt="The head and torso of a dinosaur skeleton;
          it has a large head with long sharp teeth"
     width="400"
     height="341"
     title="A T-Rex on display in the Manchester University Museum">
这会给我们一个提示,看起来就像link title:

图片标题并不必须要包含有意义的信息,通常来说,将这样的支持信息放到主要文本中而不是附着于图片会更好。不过,在有些环境中这样做更有用,比如当没有空间显示提示时,也就是在图片栏中。
主动学习:嵌入一张图片
Ok, your turn! In this active learning section we'd like you to play with a simple embedding exercise. You are provided with a basic <img> tag; we'd like you to embed the image located at the following URL:
https://raw.githubusercontent.com/mdn/learning-area/master/html/multimedia-and-embedding/images-in-html/dinosaur_small.jpg
Yes, earlier we said to never hotlink to images on other servers. But this is just for demo purposes — we'll let you off just this once.
We would also like you to:
- Add some alt text and check that it works by misspelling the image URL.
- Set the image's correct
widthandheight(hint; it is 200px wide and 171px high), then experiment with other values to see what the effect is. - Set a
titleon the image.
If you make a mistake, you can always reset it using the Reset button. If you get really stuck, press the Show solution button to see an answer.
Playable code
<h2>Input</h2>
<textarea id="code" class="input">
<img></textarea>
<h2>Output</h2>
<div class="output"></div>
<div class="controls">
  <input id="reset" type="button" value="Reset" />
  <input id="solution" type="button" value="Show solution" />
</div>
body {
  font-family: 'Open Sans Light',Helvetica,Arial,sans-serif;
}
.input, .output {
  width: 90%;
  height: 10em;
  padding: 10px;
  border: 1px solid #0095dd;
  overflow: auto;
}
button {
  padding: 10px 10px 10px 0;
}
var textarea = document.getElementById("code");
var reset = document.getElementById("reset");
var code = textarea.value;
var output = document.querySelector(".output");
var solution = document.getElementById("solution");
function drawOutput() {
  output.innerHTML = textarea.value;
}
reset.addEventListener("click", function() {
  textarea.value = code;
  drawOutput();
});
solution.addEventListener("click", function() {
textarea.value = '<img src="https://raw.githubusercontent.com/mdn/learning-area/master/html/multimedia-and-embedding/images-in-html/dinosaur_small.jpg"\n     alt="The head and torso of a dinosaur skeleton; it has a large head with long sharp teeth"\n     width="200"\n     height="171"\n     title="A T-Rex on display in the Manchester University Museum">';
  drawOutput();
});
textarea.addEventListener("input", drawOutput);
window.addEventListener("load", drawOutput);
Annotating images with figures and figure captions
Speaking of captions, there are a number of ways that you could add a caption to go along with your image. For example, there would be nothing to stop you doing this:
<div class="figure">
  <img src="images/dinosaur.jpg"
       alt="The head and torso of a dinosaur skeleton;
            it has a large head with long sharp teeth"
       width="400"
       height="341">
  <p>A T-Rex on display in the Manchester University Museum.</p>
</div>
This is ok — it contains the content you need, and is nicely stylable using CSS. But there is a problem here — there is nothing that semantically links the image to its caption, which can cause problems for screen readers, for example (when you have 50 images and captions, which caption goes with which image?)
A better solution is to use the HTML5 <figure> and <figcaption> elements, which are created for exactly this purpose — to provide a semantic container for figures that clearly links the figure to the caption. Our above example could be rewritten like this:
<figure>
  <img src="images/dinosaur.jpg"
       alt="The head and torso of a dinosaur skeleton;
            it has a large head with long sharp teeth"
       width="400"
       height="341">
  <figcaption>A T-Rex on display in the Manchester University Museum.</figcaption>
</figure>
The <figcaption> element tells browsers and assistive technology that the caption describes the other content of the <figure> element.
Note: From an accessibility viewpoint, captions and alt text have distinct roles. Captions benefit even people who can see the image, whereas alt text provides the same functionality as an absent image. Therefore, captions and alt text shouldn't just say the same thing, because they both appear when the image is gone. Try turning images off in your browser and see how things look.
Note that a figure doesn't have to be an image — a figure is an independent unit of content that:
- Expresses your meaning in a compact, easy-to-grasp way
- Could go in several places in the page's linear flow
- Provides essential information supporting the main text
A figure could be several images, a code snippet, audio or video, equations, a table, or something else.
Active learning: creating a figure
In this active learning section, we'd like you to take the finished code from the previous active learning section, and turn it into a figure:
- Wrap it in a
<figure>element. - Copy the text out of the
titleattribute, remove thetitleattribute, then put the text inside a<figcaption>element below the image.
If you make a mistake, you can always reset it using the Reset button. If you get really stuck, press the Show solution button to see an answer.
Playable code 2
<h2>Input</h2>
<textarea id="code" class="input">
</textarea>
<h2>Output</h2>
<div class="output"></div>
<div class="controls">
  <input id="reset" type="button" value="Reset" />
  <input id="solution" type="button" value="Show solution" />
</div>
body {
  font-family: 'Open Sans Light',Helvetica,Arial,sans-serif;
}
.input, .output {
  width: 90%;
  height: 10em;
  padding: 10px;
  border: 1px solid #0095dd;
  overflow: auto;
}
button {
  padding: 10px 10px 10px 0;
}
var textarea = document.getElementById("code");
var reset = document.getElementById("reset");
var code = textarea.value;
var output = document.querySelector(".output");
var solution = document.getElementById("solution");
function drawOutput() {
  output.innerHTML = textarea.value;
}
reset.addEventListener("click", function() {
  textarea.value = code;
  drawOutput();
});
solution.addEventListener("click", function() {
textarea.value = '<figure>\n  <img src="https://raw.githubusercontent.com/mdn/learning-area/master/html/multimedia-and-embedding/images-in-html/dinosaur_small.jpg"\n       alt="The head and torso of a dinosaur skeleton; it has a large head with long sharp teeth"\n       width="200"\n       height="171">\n  <figcaption>A T-Rex on display in the Manchester University Museum</figcaption>\n</figure>';
  drawOutput();
});
textarea.addEventListener("input", drawOutput);
window.addEventListener("load", drawOutput);
CSS background images
You can also use CSS to embed images into webpages (and JavaScript, but that's another story entirely.) The CSS background-image property — and the other background-* properties — are used to control background image placement. For example, to place a background image on every paragraph on a page you could do this:
p {
  background-image: url("images/dinosaur.jpg");
}
The resulting embedded image is arguably easier to position and control than HTML images, so why bother with HTML images? As hinted at above, CSS background images are for decoration only — if you just want to add something pretty to your page to enhance the visuals, this is fine, but such images have no semantic meaning at all — they can't have any text equivalents, are invisible to screen readers, etc. That is where HTML images shine.
因此,如果图像在您的内容方面有意义,则应使用HTML图像。 如果图像纯粹是装饰,则应使用CSS背景图片。
Note: You'll learn a lot more about CSS background images in our CSS topic.
Summary
That's all for now — we have covered images and captions in detail. In the next article we'll move up a gear, looking at how to use HTML to embed video and audio in web pages.